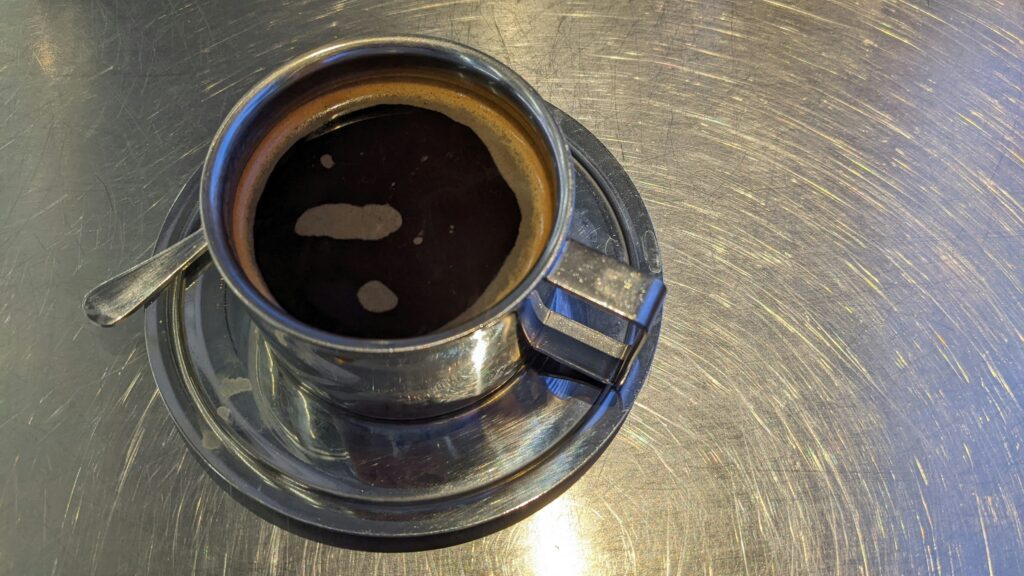
Oh man, you know that tragic moment you are barely awake, shuffling to the kitchen, craving that glorious first cup of coffee. You slam a K-Cup into your Keurig, hit that button, and… what’s this? Instead of a steaming, delicious cup, you are staring at a sad, slow dribble. Or maybe it tastes like bitter disappointment in liquid form. Talk about a morning mood killer.
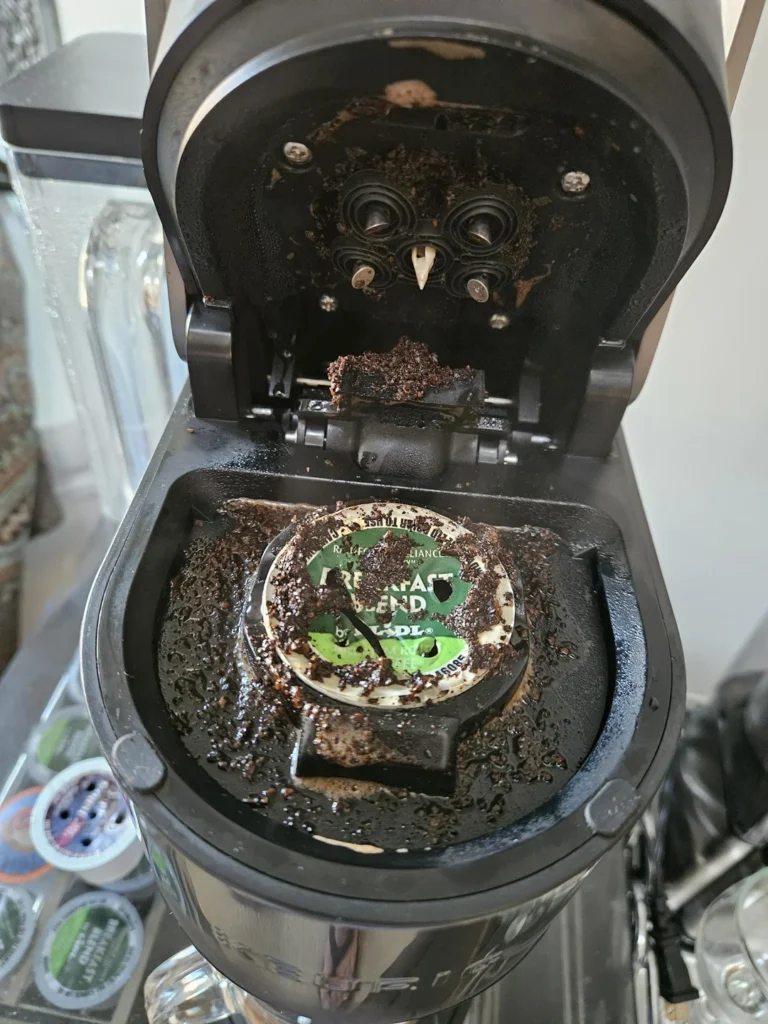
Most folks instantly point fingers at the K-Cup or freak out thinking their entire machine’s toast. No, usually it’s just some tiny, annoying problem. The real villain? The needle the bit that stabs into your coffee pod gets clogged with old grounds and oily residue over time. When that happens, water can’t do its job, and you end up with weak coffee, unpredictable brewing, or nothing coming out at all. Imagine trying to chug a milkshake through a straw stuffed with peanut butter. Yep, that’s basically your Keurig when its needle’s dirty.
Honestly, that little needle is kind of a big deal. Every single brew, it punches into the pod, letting hot water flow through all that precious coffee. But even a bit of blockage throws everything out of whack. It’s wild how something so tiny can mess up your entire caffeine ritual.
Here’s the good news no need for fancy gadgets or a YouTube degree in appliance repair. Cleaning the needle is dead simple. Grab a paperclip, some water, and give it a minute of TLC. Boom, your Keurig’s back in business and your coffee actually tastes like coffee again.
Stick around, because I’m about to walk you through cleaning that stubborn needle, step by step. Plus, I’ll toss in some clever tips to keep it running smooth, what warning signs to look for, and answers to those burning questions you never knew you had. If you’re after consistently tasty coffee every morning, this is where you want to be. Let’s get you out of the weak-coffee nightmare.
Why Cleaning the Keurig Needle Matters
Look, if your Keurig’s needle is clogged up, you’re basically begging for a sad, watery cup of disappointment. Clean needle? Now we’re talking water rushes through, grabs all those tasty coffee flavors, and boom, you’ve actually got a cup that doesn’t taste like you licked the inside of an old mug.
Oh, and don’t even get me started on the machine itself. Let grime pile up in there and you’re asking for trouble like, actual money-wasting repairs. Coffee oils, little grounds, all that nastiness just sits and festers until your Keurig starts coughing and sputtering, maybe even gives up for good. Who needs that drama?
Honestly, half the random weirdness people complain about slow drips, leaks, the cup filling up halfway like it’s got stage fright it’s usually just a clogged needle. Clean it out, and suddenly mornings aren’t a disaster. No more angry staring at a half-cup while you’re already running late. Just good coffee, every time. Is that too much to ask?
What You’ll Need Before Cleaning
Honestly, why do people make it sound like you need some kind of advanced degree to clean a Keurig needle? You don’t. Grab a paperclip yeah, the one buried in your junk drawer. Or, if you’re feeling extra, use that little Keurig tool they toss in the box (if you didn’t lose it already). A paperclip does the job just fine for poking out those stubborn old coffee grounds.
You’ll want to get some warm water and a squirt of dish soap for cleaning out the pod holder. And don’t even bother with fancy brushes an old toothbrush? Absolute gold for scrubbing out those little nooks you can’t reach with a rag. Speaking of rags, keep a clean cloth or a wad of paper towels nearby. You’ll need them for wiping down the needle area and drying everything off before slapping it all back together.
Feeling lazy? No shame. Most K-Cup holders can just chill in the top rack of your dishwasher. Just give your manual a quick glance to make sure you’re not about to ruin anything. That’s it. No magic. No secret gadgets. Just regular stuff, a little elbow grease, and maybe a podcast in the background.
Step-by-Step Guide: How to Clean a Keurig Needle
Cleaning out that Keurig needle? Sounds like a pain, but honestly, it’s not rocket science. Here’s how I do it when my coffee tastes like sadness and old grounds.
First unplug the thing. Don’t get electrocuted over a cup of joe, yeah?
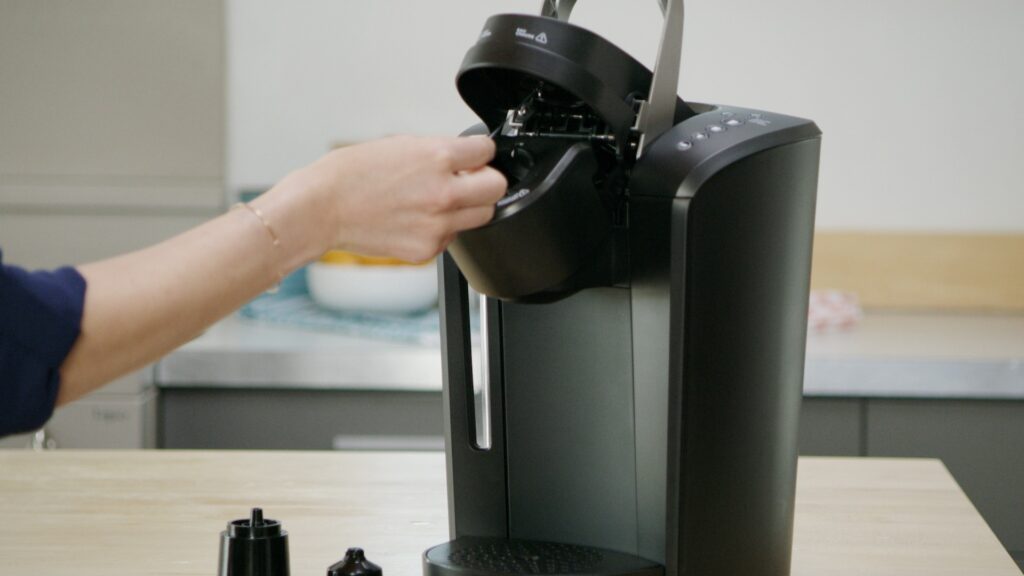
Next, pop the handle open and yank out the little K-Cup holder. Some models make you press a button or twist it, which is mildly annoying, but you’ll figure it out.
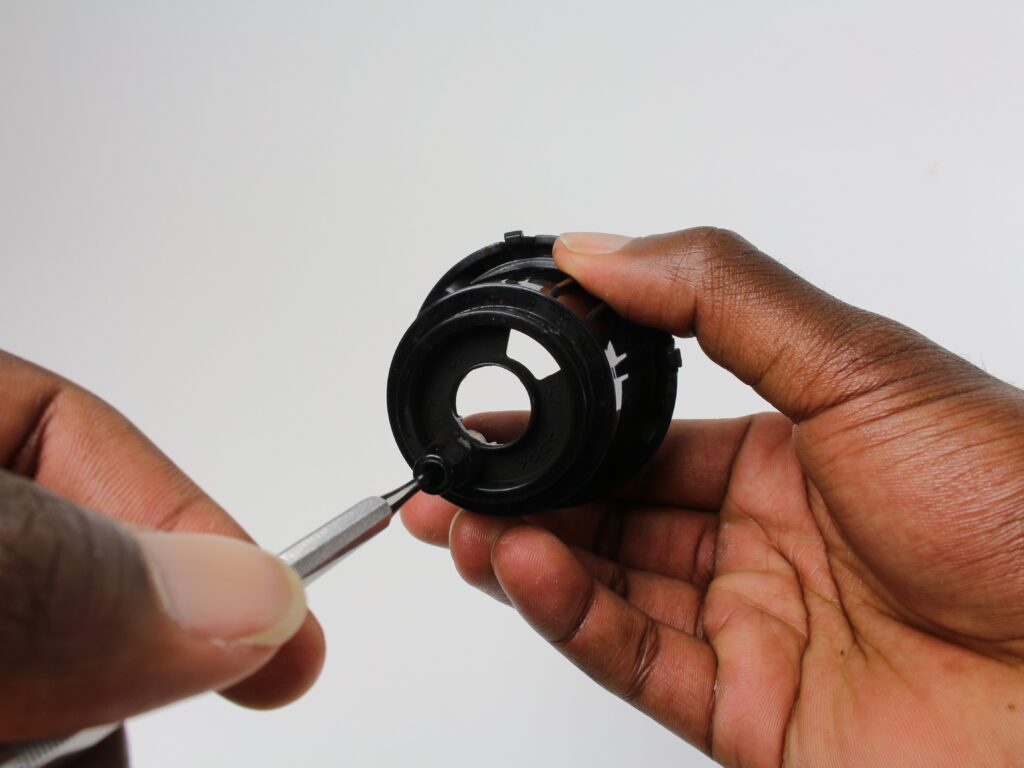
Now, look inside that empty space. See those two mean-looking needles? One’s up top, one’s down below. They’re the reason your pods get stabbed every morning.
Grab a paperclip (old-school style), straighten it out, and poke it gently into the tiny holes in those needles. Wiggle it a bit, don’t go Hulk on it or you’ll bend something you shouldn’t.
Then, haul the K-Cup thing to the sink. Give it a soapy bath nothing fancy, just warm water and dish soap. If you’ve got a little brush, use it to scrub out all the gunk hiding in the crevices. Rinse it off, let it dry, maybe admire your handiwork for a second.
While that dries, take a damp paper towel or rag and wipe around the needle zone. Grounds get everywhere and, well, it’s gross.
Now just throw everything back together, plug your Keurig back in, and run a brew cycle with only water. No pod. This flushes out the last of the junk so you don’t end up drinking mystery debris.
Your Keurig’s back in action, ready for your next caffeine fix. Cheers to not starting the day with gritty coffee.
Maintenance Tips to Keep Needles Clean Longer
Keeping that Keurig needle clean? Way easier than you think, honestly. Just going to remember a few little habits nothing wild. Trust me, your coffee will thank you.
First off, descale every few months maybe every 3 to 6, if you want to get technical. Water’s sneaky; it leaves minerals everywhere, like an uninvited guest that never leaves. Run some descaler through and boom, you’re good.
Now, about water. If you’re using straight-up tap water, hey, no judgment, but filtered water is way better. Less crud gets left behind, so your needle stays happier (and cleaner) for longer.
Here’s a lazy hack: once a week, just run a water-only cycle. No coffee, just water. Even if you’re not a daily coffee fiend, this little rinse helps clear out gunk before it turns into a real problem.
And don’t get me started on leaving those used K-Cups in the machine. Big nope. They trap moisture and oils, which means clogs. Just pop them out right after brewing. Takes two seconds, saves you headaches later.
Oh, and that water reservoir? The drip tray? Yeah, they get gross. Wipe them out now and then. Mold is not a cute look for any kitchen gadget.
Do all this, and you’ll spend way less time scrubbing and more time sipping. Honestly, a tiny bit of effort now saves you from coffee disasters later. Keep it easy, keep it clean, and your Keurig will love you back for ages.
FAQs About Cleaning Keurig Needles
How often should I clean the needle?
For most people, once a month is enough. If your coffee starts tasting weak or slow, clean it sooner.
Can I use vinegar on the needle?
Vinegar works well for descaling the whole machine, but not for the needle itself. Use a paperclip or cleaning tool to remove clogs.
What if the needle is stuck?
Unplug the machine first. Gently loosen grounds with a paperclip. Do not force it, as this can bend or damage the needle.
Is the K-Cup holder dishwasher-safe?
Most K-Cup holders can go on the top rack of a dishwasher. Check your model’s instructions to be sure. Hand washing works fine too.
Will cleaning improve coffee taste?
Yes. A clean needle lets water flow evenly through the pod. This ensures full flavor and a stronger, richer cup every time.
Extra Cleaning Hacks Coffee Lovers Swear By
Look, nobody wants to deal with a crusty Keurig first thing in the morning trust me, I’ve been there, and it’s not pretty. Here’s the lowdown if you actually want your coffee to taste like coffee (and not like the ghost of last week’s hazelnut K-Cup).
First off, those rinse pods? Not a scam, surprisingly. Pop one in every so often and let it do its thing—it’ll clear out gunk from the needle and all those tiny bits you’ll never see but definitely taste if you ignore them. Super quick, zero effort, and your future self will thank you.
Next, flavored K-Cups are delicious, but man, do they leave behind a sticky mess. After you brew one of those, just run a hot water cycle. No rocket science here, just hit the button with no pod and flush out the syrupy leftovers. Keeps everything running smooth and your next cup from tasting like an accidental science experiment.
Honestly, just a little routine goes a long way. I’m not saying you need a spreadsheet (unless that’s your thing), but maybe peek at the needle once a month, give the reservoir a quick wipe every week, and descale every few months. That’s it. No fuss.
o this stuff and you’ll dodge all sorts of drama—clogs, leaks, and the dreaded sad, weak coffee. People who actually keep up with it swear their Keurig coffee tastes way better. Plus, it takes like, five minutes. Worth it for a decent cup, right?